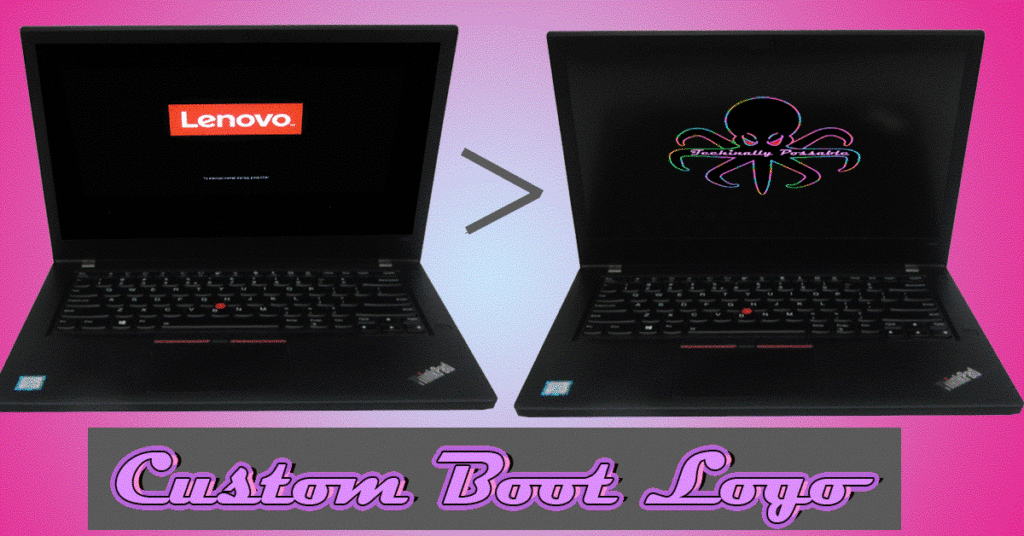
The Why/Intro
go to start off this project I started by trying to customise Linux, then occurred to me that every time I boot up my computer there was this ugly logo made now I can say what they want about ThinkPad’s I think they are possibly one of the best computers ever created correction one of the best laptops ever created I think they’re ridiculously reliable and quite sturdy my crucible of choice what’s the tea for 80 which was a Lenovo ThinkPad.
here’s a little ThinkPad history lesson, ThinkPad was one of the first credible computers of the size and IBM created date many years before I was born growing up I saw thinkpads as stuffy office laptops I never really saw them as anything that I would want to use for any amount of time, then as I grew older I started to value other things Alienware laptop computers more reliable computers less showy ones not brought me to thinkpads which are incredibly Powerful the size of them and ridiculously understated there is a divide in the ThinkPad community ThinkPad used to be owned by IBM but the ThinkPad brand is now owned by Lenovo some people think that actual thinkpads stopped being made and that the new ones we’re just cheap imitators I however do not see myself as one of those people.
enough me babbling about why I love ThinkPad’s I will leave links you to explore ThinkPad’s history with IBM and Lenovo and the slash ThinkPad subreddit for you too how crazy we are over ThinkPad’s.
now I should get on with what is about how I modded my BIOS how to have a custom boot logo.
some of my attempted images


Final outlook
The Guides
WARNING
i need to warn you that you are on your own. even though it works fine, i’m not responsible of what you do.
Windows
Step 1.
Download the BIOS update utility
Download the BIOS Update Utility from the Lenovo support website and extract the files:
to download the BIOS update, go on lenovo’s support website, choose drivers and updates and find your model.
Make sure you do not install the BIOS update on the last screen:
Step 2.
Prepare the image
now the guidelines from my specific 8480 ThinkPad the hard limits as follows
image file size are limited to 60kb!!
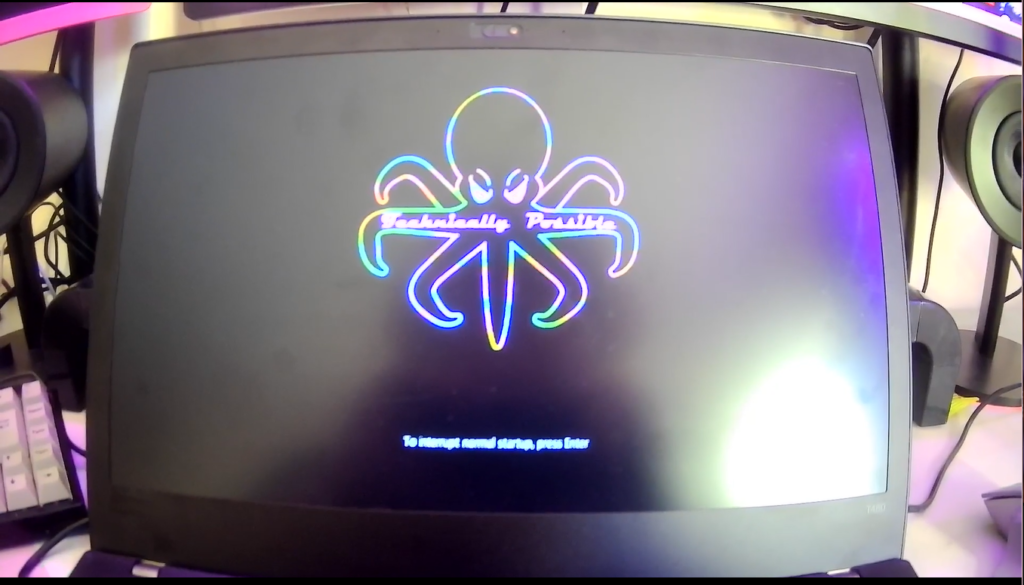
valid image formats are as follows (.bmp) jpeg (.jpg) gif (.gif), but I have found that most image format other than GIF due to these size constraint and that size constraint is very important if it goes over that size it will not work whatsoever using a gif what’s the best way to get a decent logging logo at a resolution I wanted with it being under 60 kilobytes my logo was 59.9 kilobytes image resolution I thought would be an issue to begin with but I later found that 60KB that’s why 60 kilobyte number is so important it just won’t store it in memory otherwise I will add the load the variations of my logo that I tried just to see what I could get working
Step 3.
Flash the image
copy the image into the folder we extracted above(where your driver files installed). for example, the path of the folder I extracted is at C:\DRIVERS\FLASH\n1cuj12w ( this folder name might different for you )
after you’ve copied your logo named logo after you’ve copied your image named logo into that file WINUPTP EXE this will pop up and say ” do you want to update ThinkPad BIOS or update the model number” you want to update the BIOS Obviously.
you’ll then be prompted to say that a custom startup image was found do you want to apply custom image to the system click yes.
make sure your laptop is plugged in then click Next and finish and ok your computer should reboot after reboot you will see your custom BIOS image
Linux
Step 1.
get the BIOS update to install your custom boot logo, you need to flash a BIOS update. to download the BIOS update, go on lenovo’s support website, choose drivers and updates and find your model. next, go in the section BIOS/UEFI and download the BIOS Update (Bootable CD). it will download a iso image. if you can’t find the update image, that means that you’re out of luck, and you can’t get a custom boot logo. sorry.
Step 2.convert the iso image Now that you have the iso image, you need to convert it to a
img file. to do so, run the following command in a terminal:
geteltorito -o bios-image.img bios-image-downloaded.isoIf you don’t have geteltorito, look online to install it.
Step 3.flash the image on your usb drive now it’s time to flash the image on your usb drive. get the name of your flash drive using
lsblk, plug your usb drive, and runlsblkagain to see your drive. go into the folder where the img file is located, and run in a terminal:sudo dd if=bios-image.img of=/dev/sdX bs=1M status=progress oflag=syncwhere X is your drive letter that you know thanks to
lsblk.Step 4.
flash the BIOS update reboot your computer, and boot on the usb flash drive. if you don’t know how, the internet should help you with that. now that the flash utility has booted, choose the second option, and follow the instructions. the computer will reboot, flash the update, and when it will reboot, you should get your custom boot logo!
Phil From deadbaed